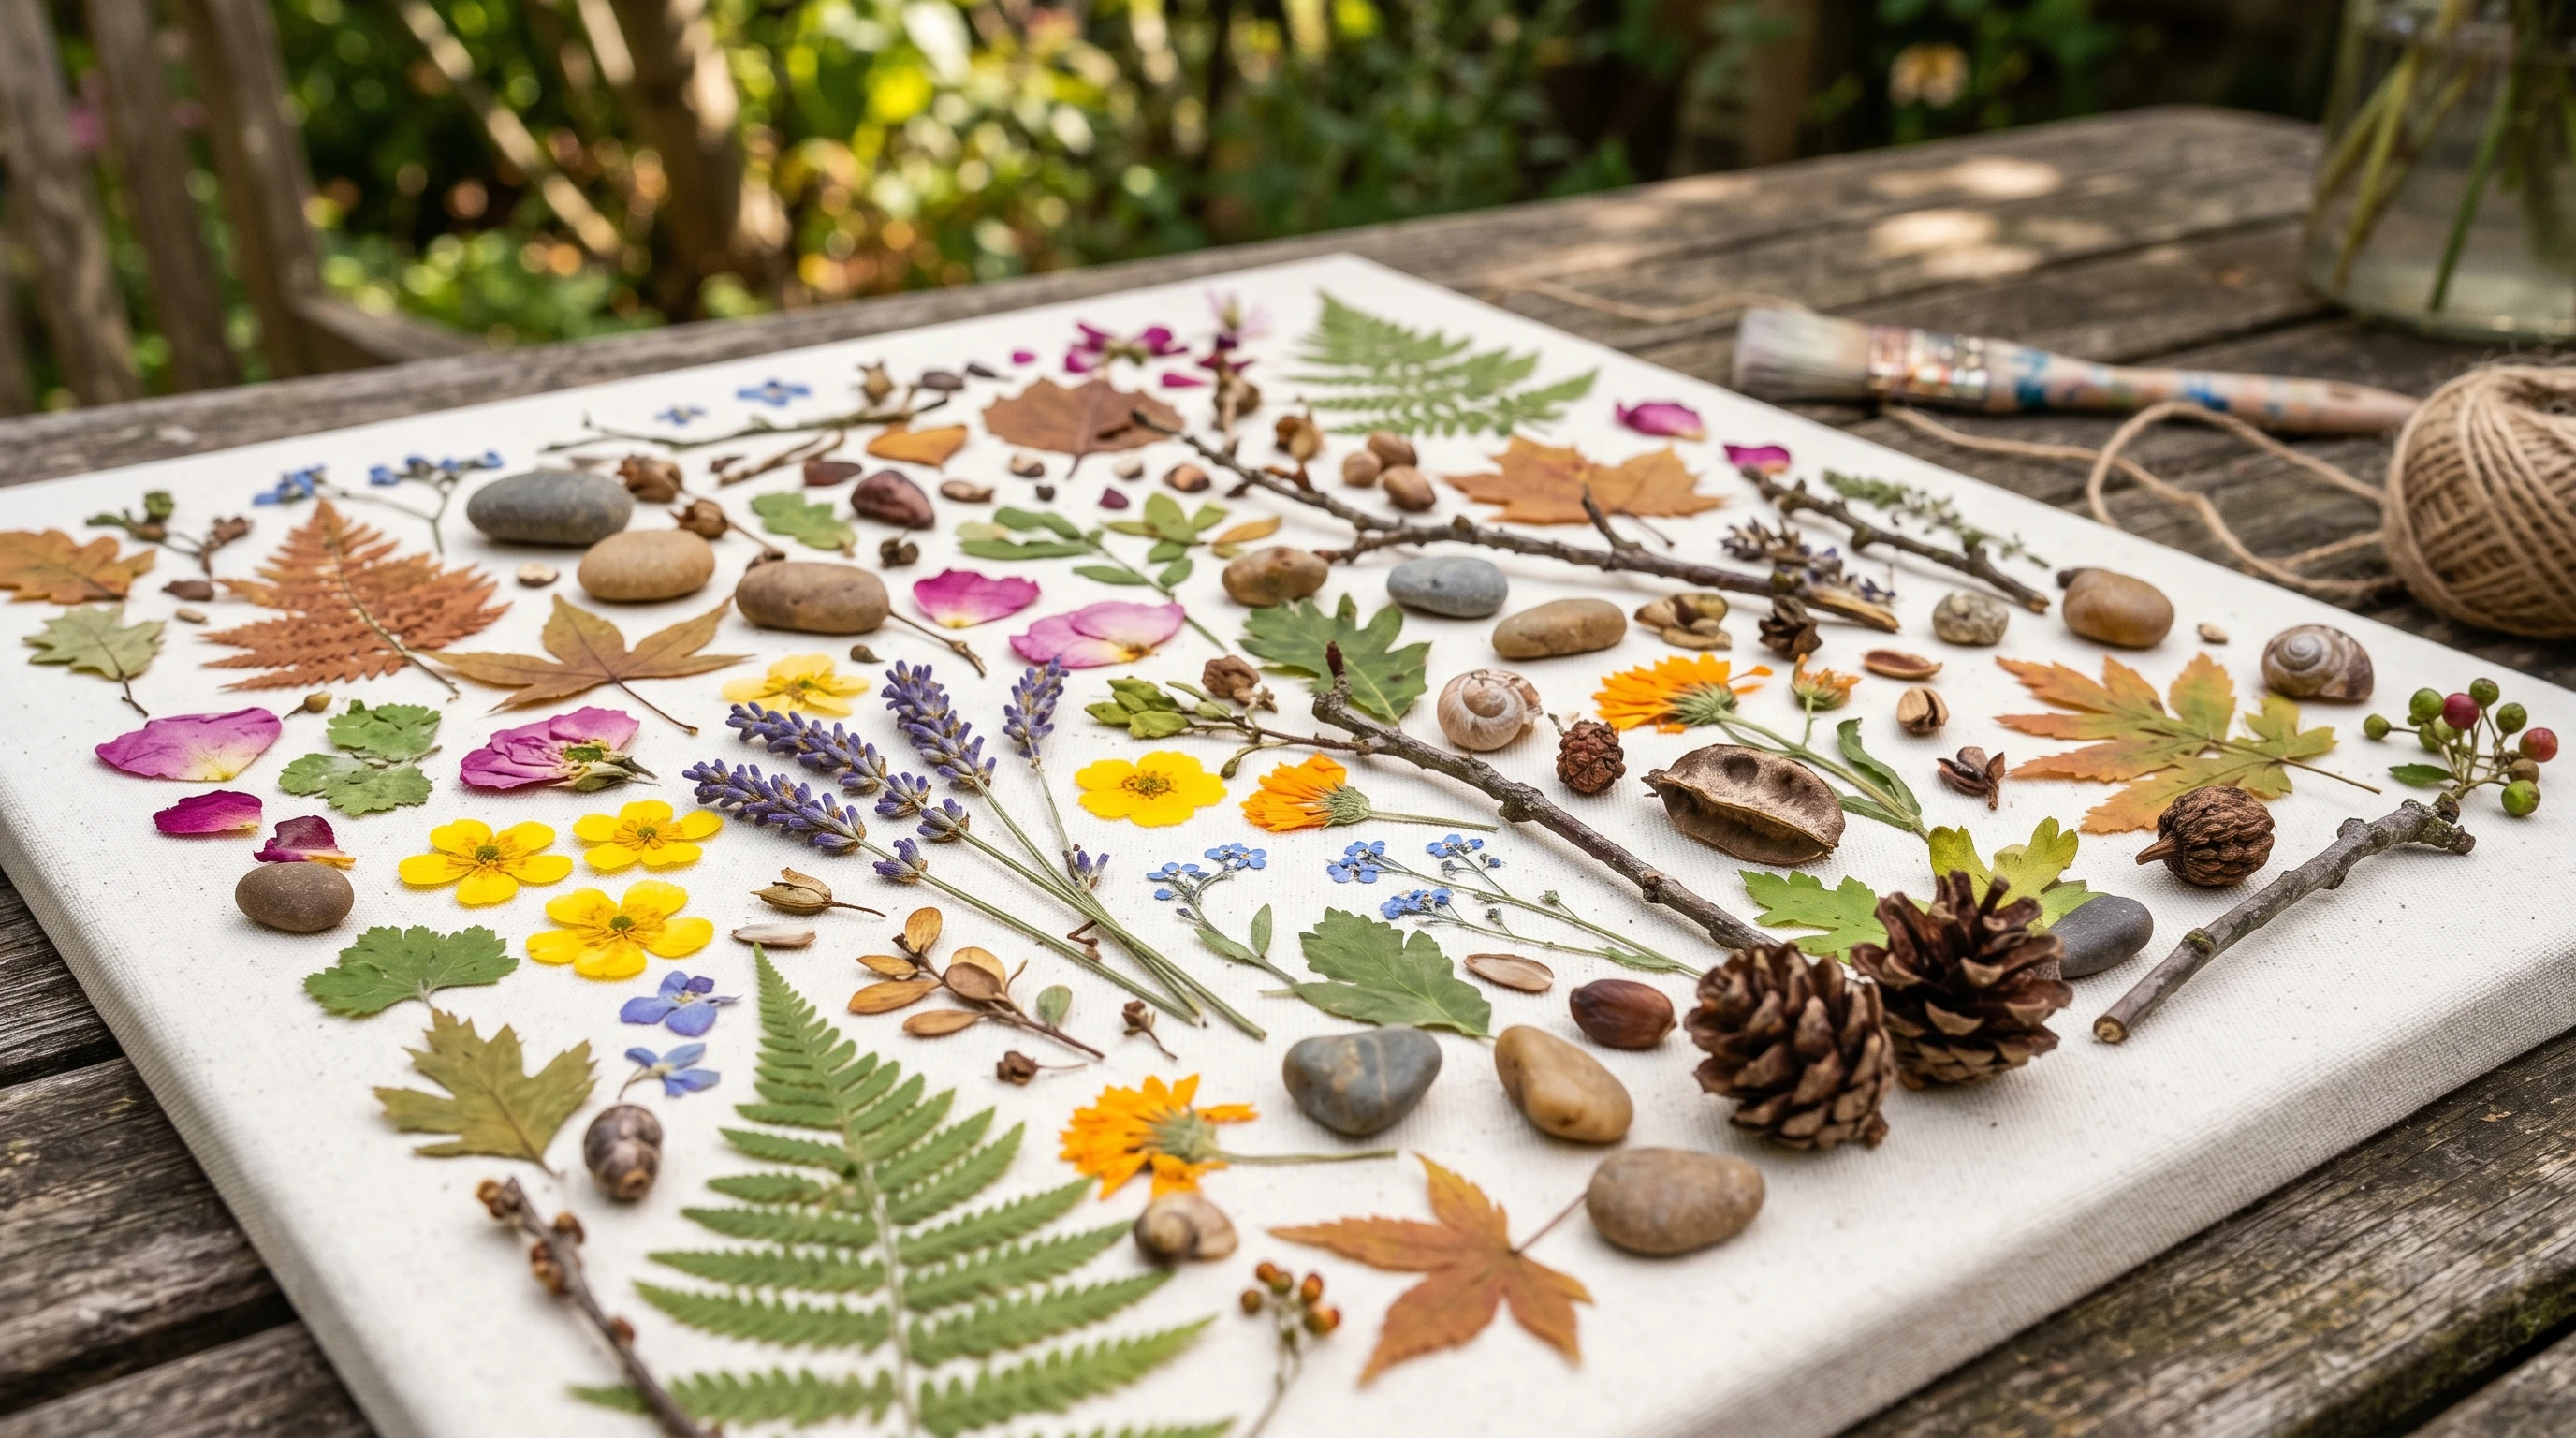
Art does not always need fancy supplies or a big budget. There is something special about creating art with materials straight from nature. The process is relaxing, eco-friendly, and always brings a sense of adventure. Whether you are picking up smooth pebbles from the beach or gathering colorful fall leaves, working with natural materials can be a calming and rewarding experience that connects you to the world around you.
From earthy textures to unexpected patterns, nature is full of creative inspiration just waiting to be tracked down. Creating art this way not only adds beauty to your life but is also a fun way to spend time outdoors, either solo or with family and friends. If you are looking for new ways to express yourself, natural art is worth checking out.
This guide covers all you need to know to get started with making art from nature: finding materials, choosing the best projects, and keeping your creations both beautiful and sustainable. Whether you are a beginner or already into crafting, you will find plenty of tips and inspiration here.
1. Gather Ideas and Inspiration
Every creative adventure starts with gathering ideas. Nature offers so many possibilities, from sculptural branches to tiny acorns and feathers. To stay safe, avoid protected areas and be cautious with sharp or moldy items. Embracing the joy of discovery while staying mindful of safety can spark excitement and motivate your next project.
Where Inspiration Hides:
- Parks, forests, and walking trails.
- Your backyard or garden.
- Beaches and riverbanks.
- Local farmers’ markets or flower shops (for dried plants and seeds).
What To Look Out For:
- Unusual colors or shapes in stones and leaves.
- Soft moss or textured bark.
- Dried grasses, flower petals, seed pods, or pinecones.
- Shells, driftwood, and smooth pebbles.
Collecting small bags at a time keeps things manageable. It is also smart to snap a few reference photos before you begin your adventure. You never know when an odd-shaped rock or a twisty branch will spark your next idea. Sometimes, just looking over your finds can bring a fresh burst of creativity.
If you’re out with friends or kids, try making a game out of spotting the most eye-catching items. Nature can create fun, shared experiences that build confidence and connection.
2. Choose Your Natural Art Materials
The fun really starts when you pick out what you want to use. Instead of overwhelming yourself with too many things, begin slowly and focus on materials that appeal to you. Some are better for certain projects than others, but there are no strict rules. Feel free to experiment and see what works best for you.
Popular Natural Materials:
- Leaves: All shapes, sizes, and colors. Great for collages or pressed art.
- Stones: Especially smooth or flat ones, perfect for painting or mandalas.
- Flowers: Fresh or dried, both are nice for arrangements or pressed designs.
- Pinecones, acorns, and seeds: Add dimension to crafts and mobiles.
- Sticks and twigs: Good for sculpture, frames, or weaving cool designs.
- Bark and moss: Interesting textures for mixed media pieces.
- Shells and driftwood: Beautiful for decor and natural wall art.
What To Avoid:
- Anything from protected areas or rare plants.
- Wet or moldy material will not last long indoors.
- Pick living plants in public parks (always check the rules).
Give everything a gentle wash at home to remove bugs and dirt. Let it dry completely before you start your project. That way, your artwork will last longer and look its best.
Art does not have to be complicated. Starting with easy, fun projects can boost your confidence and make the Process Enjoyable, no matter your skill level.
Art does not have to be complicated. There are lots of fun and easy projects you can try, even if you consider yourself a beginner. The best choice depends on your mood and what materials you have found. Here are a few projects that work well for all ages and skill levels.
Easy & Enjoyable Natural Art Projects:
- Leaf Collages: Arrange leaves into animals, landscapes, or abstract designs. Glue onto paper or cardboard.
- Rock Painting: Paint simple patterns, mandalas, or cute faces on cleaned stones.
- Pressed Flower Frames: Press flowers or leaves between pages of a book, then display them between panes of glass or in a clear frame.
- Nature Mobiles: Suspend feathers, shells, seed pods, and pinecones on strings from a sturdy branch.
- Bark & Moss Wall Art: Glue bark, moss, and small stones onto a board to make a nature-texture masterpiece.
- Pinecone Creatures: Glue on acorns, seeds, or dried leaves to turn pinecones into eye-catching animals.
Tips for Choosing a Project:
- Start with something simple and grow your ideas from there.
- Mix materials for different textures and colors.
- Do not worry about being perfect. These quirky, unique touches are what make your art special.
You can also check out online galleries, social media, and Pinterest for nature art ideas and see what other people are making for even more all-in-one inspiration.
4. Tools and Techniques for Making Art with Nature
You do not need a ton of tools for most nature art. Simple supplies keep things stress-free and allow for fun. Here’s what I recommend having in hand for smooth crafting:
Handy Tools and Supplies:
- White glue, craft glue, or a glue gun
- Scissors or small pruners
- Paints and brushes for stones and sticks
- String, twine, or wire for hanging mobiles or garlands
- Paper or canvas bases for collages
- Cotton swabs, toothpicks, or old toothbrushes for adding cool textures
Basic Techniques to Try:
- Pressing leaves or flowers in thick books for about a week.
- Painting right onto rocks or branches (acrylic paints work well).
- Weaving grasses or long leaves over sticks to create mini tapestries.
- Layering and gluing for three-dimensional collage effects.
If your project doesn’t turn out perfectly the first time, don’t worry. Experimenting and trying new techniques often lead to the best ideas. Making art from nature is about exploring and enjoying the process, not just the final product.
5. Display and Preserve Your Natural Artwork
After you finish, snap pictures of your artwork and share them on your social media or website. Displaying natural art is a little different from traditional art, because you want to keep it looking fresh for as long as possible.
Ways to Show Off Nature Art:
- Hang mobiles or wall art near a window for extra sunlight.
- Frame pressed pieces behind glass to prevent dust and fading.
- Cluster painted stones in a bowl or along a windowsill.
- Lean twig sculptures or bark collages on shelves or mantles.
How To Make It Last:
- Keep finished projects out of direct heat or very damp spaces.
- Spray-dry flowers, moss, or bark lightly with a craft sealer to keep them from crumbling.
- Dust gently with a soft brush every so often.
- Accept that some natural materials will change over time. It is part of the creative process and adds even more charm.
Another trick is to rotate your displays, swapping out different pieces during the year. In doing so, it keeps your decor feeling fresh and gives you reasons to create new projects as the seasons change.
6. Creating Art with Kids and Groups
Nature art is a hit with kids, families, and friends. It is also a perfect activity for group get-togethers or classroom fun, making it accessible for all ages. It encourages everyone to slow down and notice the small details all around them. Plus, it gets everyone away from screens for a little while, which is always a bonus in my book.
Fun Tips for Group Nature Art:
- Let each person collect a few favorite items, then swap and share.
- Make a collaborative collage: everyone adds a piece in turn.
- Try an outdoor art scavenger hunt, searching for different textures or colors.
- Encourage experimenting—let things get a bit messy and creative.
You can even turn a day of hiking, picnicking, or gardening into a mini art event by planning a nature art project for everyone to work on together at the end of the day. It’s a memorable way to bond and be creative outdoors.
Common Challenges & Quick Solutions
Materials Keep Falling Off My Art
- Try stronger glue, like hot glue, for heavier items.
- Rough up the surface a bit first so the glue sticks better.
Leaves and Flowers Lose Their Color
- Press between paper, keep out of direct sunlight, or use clear spray sealant.
- Paint over dried leaves to brighten faded areas.
Artwork Starts to Smell or Decay
- Make sure everything is fully dry before gluing.
- Avoid leaves or plants that are too green or juicy.
If you want your pieces to last, consider using artificial or dried versions of certain materials for display. With a little practice, you will figure out which natural elements work best for your projects and climate.
Next Steps: Try Your Own Nature Art Project
Making art with natural materials is about having fun and tracking down new ways to see the world. You do not have to be an expert. Just be curious and open to trying something new. Take a walk outside, pick up a few interesting finds, and turn them into something original. It’s a rewarding way to unwind and get creative all at once.
Your Action Plan:
1. Go for a walk and gather materials that catch your eye.
2. Pick a simple project—try a leaf collage or paint a stone.
3. Display your creation or share it with someone you care about.
If you already have a favorite way to make art with natural things, I’d love to hear about it. What kind of nature art project will you try first?
We’re including arts and crafts in our VBS activity next week for the kids at our church, and this guide has been so helpful! The ideas of leaf collages, painted stones, and pinecone creatures feel perfect for helping the children connect their creativity with God’s creation. I’m sure they’ll enjoy gathering materials outdoors just as much as making the art itself.
When working with younger kids, which natural materials do you find both safe and easy for them to handle, while still sparking their imagination?
Thank you, Alice, for your uplifting comment. It is a great learning experience for kids to explore God’s creation! Flat rocks, pinecones, acorns, leaves, and small sticks are safe for kids to pick up and handle. You may want to wash these items off carefully. If any of them break off, it is still great for doing a collage. I would use non-toxic glue and paint when gluing and or painting with kids. Instead of using paint brushes, use the small sticks to paint. I have done it and found it to be so much fun.
Flowers can add color to any collage (you can press flowers and dry them out between the pages of a book or hang them upside down), but some flowers may cause an allergic reaction and might not be wise to pick, such as ragweed and poison oak. Wild mushrooms are not safe to handle, as they are poisonous.
My suggestion is for you to take a walk in the area where you are planning to take the kids and see what’s there. Then take pictures of the flowers in your area, research them to make sure they’re safe to pick, before taking the kids out to explore that place. If you are worried they might touch the wrong things, have them wear rubber gloves, which might not be a bad idea.
Another suggestion is to plan different art activities along with how to do them, before you take the kids out, so each child can choose which one they want to do. I truly believe kids are like sponges; they absorb everything you teach them, especially about nature.
I hope I answered your question by giving you suggestions. Please write to me after you do your nature activity with the kids, and let me know how everything went.
All my best to you,
Heidi